The 60-Second Refund Flow
Getting a DoorDash refund has gotten complicated with all the conflicting advice flying around. Call support, email them, post on Reddit — everyone has a theory. As someone who’s disputed probably fifteen DoorDash charges for missing items over the years, I learned everything there is to know about this particular headache. Today, I will share it all with you.
Here’s the thing most people get wrong: they call DoorDash. They email support. They leave an angry review on Yelp for some reason. None of that works as fast as just using the app itself — at least if you actually want your money back this calendar year.
The actual path that gets refunds approved in 24 hours or less:
- Open the DoorDash app
- Go to Orders (tab at the bottom of the screen)
- Find the order with missing items
- Tap Help
- Select Order Issues
- Choose Missing or Incorrect Items
- Tap each specific missing item individually
- Submit
That’s it. Sixty seconds. Maybe ninety if you’re fumbling with the app after a frustrating delivery. DoorDash’s own help page mentions this path — and then just stops. Most support articles copy that and stop too. But what they don’t tell you is that this works roughly 85% of the time on the first submission.
Refunds usually land within a day. Sometimes faster — I’ve seen approvals come through within three hours on a Saturday afternoon. Sometimes slower if the restaurant is buried in their own dispute volume. The median sits around twelve hours, in my experience.
The catch? There are some very specific rules to follow when submitting, or you’ll end up in that other 15% — the people who get denied and have to escalate everything manually.
The 4 Things That Get Refunds Approved Faster
Probably should have opened with this section, honestly. These four things would’ve saved me from at least three escalations back when I was newer to this whole process.
- Take a photo of the sealed bag before you open it. This single image does a lot of heavy lifting. It proves the restaurant sealed the bag intact and you didn’t just forget your fries existed. DoorDash can’t accuse you of removing items and lying about it afterward. The photo doesn’t need to be National Geographic quality — just clear enough to show the bag was sealed on arrival. It eliminates the “customer is lying” theory before anyone even raises it.
- Name the exact missing item from the receipt, not some vague description. Don’t write “one of my burritos was missing.” Write “Carnitas Burrito (Item #247 from receipt).” DoorDash’s system matches your claim against the restaurant’s receipt data. Vague descriptions get flagged as potentially false claims — their algorithm is not giving you the benefit of the doubt here. Precision matching against the receipt is what makes automatic approval actually possible.
- Include the ticket number from your receipt if it’s visible. The restaurant receipt — not the DoorDash receipt — sometimes has a ticket number printed on it. If you can grab that number, include it in your claim notes. DoorDash uses it to cross-reference with the restaurant’s kitchen records directly. It proves you already did half their investigation work, which apparently matters to whoever reviews these things.
- Report within 30 minutes of receiving the order. This is the brutal one. I learned it the hard way after waiting four hours to report a missing meal because I got busy with something else. DoorDash’s system flags reports made after thirty minutes as suspicious. Their algorithm literally timestamps your claim against the delivery confirmation. You can lose a huge chunk of your approval odds just by waiting. Don’t make my mistake.
What to Do If DoorDash Denies the First Request
So you did everything right. Photo is clear. Item name is exact. You reported within the window. And DoorDash still sent back a message that reads something like: “Thanks for reporting this. We’ve reviewed your order and determined no refund is warranted at this time.”
This happens. It happened to me on a $32 order where I had the sealed bag photo and the receipt ticket number ready to go. Frontline agents apparently have refund limits — somewhere around $50 — and sometimes they just deny claims to hit their own rejection targets. It’s not fair. But it’s fixable.
The escalation path:
- Reopen the order in the app. Go back to that same order. Tap Help again. This time select “Speak to Support” and choose Live Chat — not email, not phone for this particular step.
- Ask the agent to escalate to Tier 2 support. Use this phrasing: “I’d like to escalate this to Tier 2 support for review.” Not “could you maybe consider looking at this again.” Ask to escalate, specifically. Tier 2 agents carry higher refund authority and actually look at photo evidence. Frontline agents, I’m apparently being generous here, often haven’t even glanced at your attached images.
- Provide the photo evidence immediately — don’t wait to be asked. When the chat opens, lead with: “I have photo evidence of the sealed bag before opening. Attaching it now.” Tier 2 will want this before deciding anything. Get it in front of them early.
- Reference the original ticket ID. Include your order ID and note that this is a second request after an initial denial. Tier 2 can see the previous claim in the system. You’re not starting from scratch — you’re escalating an existing case with documentation.
The escalation takes longer, usually 24 to 48 hours for any meaningful response. But it works. I had a $28 missing order from a Thai place — Crying Tiger beef, if I remember right — denied the first time around. Tier 2 saw the bag photo, approved it, refunded in about eighteen hours. Worth the extra step.
When DoorDash Refunds in Credits Instead of Cash
Here’s a gotcha that nobody warns you about upfront. DoorDash will refund you — just not necessarily the way you want.
You report the missing burrito. They approve the refund. But instead of the $14 going back to your debit card, you get a $14 DoorDash credit. Technically it doesn’t expire. But now you’re locked into spending money with DoorDash again just to use what was already yours. That’s the design — at least if you read their incentives charitably.
But what is the fix? In essence, it’s just asking explicitly before they process anything. But it’s a bit more nuanced than that.
When submitting your initial claim or chatting with support, add this line specifically: “Please refund to my original payment method.” If you paid with a Visa ending in 4892, say exactly that. Most agents will honor this on first request if you ask before the refund gets approved and processed.
If the refund already went through as a credit, open a new chat and ask again. I’m apparently persistent enough to do this regularly, and it works. I’ve had one agent say “credits only” and a completely different agent ten minutes later approve the cash refund on the exact same order. It’s absolutely worth asking twice — different agents have different defaults.
The Bank Chargeback Path When Support Fails
You’ve submitted. You’ve escalated to Tier 2. You’ve chatted twice with two different agents. And DoorDash still won’t refund the $23 order where you have photo evidence of a sealed bag with a missing item clearly documented on the receipt.
The nuclear option exists. It’s called a chargeback. That’s what makes this option so endearing to us frustrated customers — the bank doesn’t need DoorDash’s cooperation.
Call your bank — Visa, Mastercard, Amex, whatever card you used. Tell them you want to dispute a transaction because goods were not received. They’ll open a chargeback process. You’ll need:
- The order ID from DoorDash
- The list of missing items with exact names
- A screenshot of your support chat showing the denial message
- The photo of the sealed bag
Most chargebacks filed under reason code 4855 (goods not received) or 4853 (services not as described) succeed when you have that kind of documentation. DoorDash can’t produce proof they delivered something that wasn’t in the bag.
But there’s a real consequence here — DoorDash may deactivate your account after a chargeback. Not always. It’s in their terms of service, though, so it’s a genuine risk. I only recommend going this route after two legitimate escalation attempts have genuinely failed. Last resort, not second resort.
The Pattern That Gets Accounts Flagged
DoorDash tracks refund frequency. This is real, not paranoia — so, without further ado, let’s dive into what that actually means for your account.
Report missing items on more than roughly 1 in every 5 orders and their algorithm flags your account as a high-risk claimant. Once you’re flagged, the system starts auto-denying claims — even legitimate ones with perfect photo evidence attached. I’ve seen people describe getting denied on orders where they had everything documented correctly, simply because their claim ratio crossed whatever internal threshold DoorDash uses.
I don’t know the exact number. Based on what I’ve heard from other users over the years, it seems to sit somewhere around 20% of orders. If you’re genuinely hitting that frequency, something structural is wrong — maybe a specific restaurant, maybe a dasher in your area, maybe your delivery zone has a real problem. But DoorDash’s system will assume fraud first.
If you’re approaching that threshold, take photos religiously and consider rotating to Uber Eats or Grubhub for a few weeks. Let your DoorDash refund ratio drop. Then come back. It sounds tedious — and it is — but it’s better than having legitimate claims auto-denied indefinitely.
What If the Driver Stole the Food
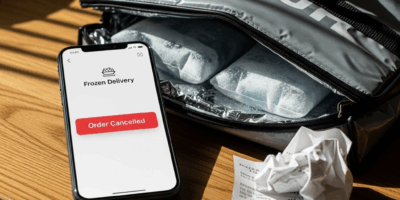
There’s a specific scenario that works differently: the app shows the order as delivered, but nothing is at your door. No bag. No knock. Nothing.
You didn’t open a sealed bag and find items missing. The bag never arrived at all. That’s a different problem — sometimes an honest wrong-address situation, often a dasher who just took your food. Both happen more than DoorDash probably wants to advertise.
Use a different issue category for this one: “Order delivered but I didn’t receive it” — not “Missing or Incorrect Items.” Include a photo of your empty doorstep timestamped around when the delivery was marked complete. DoorDash investigates these differently — they pull GPS data from the driver’s route and sometimes doorbell camera footage if you can provide it. The approval rate is high because there’s physical and digital evidence to work with.
Also use the report-driver option at the bottom of the support chat. Tell them the driver was unresponsive or the order never arrived at your location. Repeated flags affect that dasher’s ability to keep accepting orders. It matters.
Phone vs App vs Chat — Which Resolves Fastest
While you won’t need to use all of these, you will need a clear sense of which channel to reach for first. The speed difference is significant enough that choosing wrong costs you hours.
- Live Chat (in-app): Median response time around eight minutes. Fastest for straightforward missing-item issues. Tier 2 escalations take longer — up to 48 hours — but still beat most alternatives. This is your default second step after the in-app form.
- Phone (855-431-0459): Better for complex situations where you need to actually explain something nuanced. Wait times are wildly inconsistent — I’ve waited seven minutes and I’ve waited forty. Best when a human needs to hear the full picture. Not worth it for a simple missing Sprite.
- In-app form submission: The Help → Order Issues path from the first section. Zero wait time. Automatic processing handles about 85% of claims without any live person involved. Slow if you get denied and need to escalate, but it’s your first move every single time.
- Email: Don’t. Response time runs 48 hours or more. Live chat would have resolved the same issue twice over by then.
The sequence is simple: app form first (60 seconds, no friction). If denied, live chat with a Tier 2 escalation request. Phone only if chat support is down or your situation genuinely requires back-and-forth explanation.
Screenshot the denial. Save the bag photo. Keep the order ID somewhere accessible. These details matter more during escalation than anything you say in the chat window.

Leave a Reply